
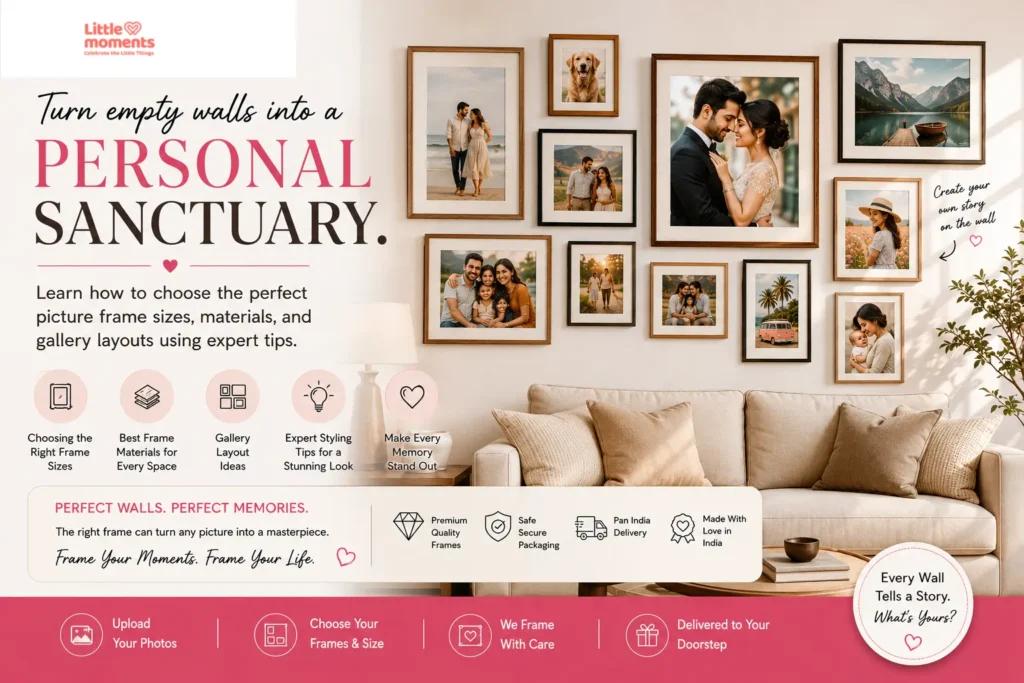
A home is more than walls and furniture. It’s a personal space that reflects your journey and your most treasured relationships. Modern interiors often lean towards clean surfaces and minimal colour, but a space only truly feels alive when it shows the milestones, travels and faces of the people who live there.
Personalised framing lets you swap generic shop-bought art for your own memories. Whether you want a family portrait in the living room, a gallery wall of travel highlights or a quiet reminder of someone special on your desk, knowing how to match personalised photo frames to your space makes all the difference.
This guide covers frame sizes, materials, layouts and placement, so you can choose the right frame for every corner of your home.
The Role of Personal Photos in Modern Wall Styling
In modern interiors, walls aren’t empty backgrounds; they’re space for storytelling. Mass-produced prints fill a wall, but they don’t mean anything. Your own photos, framed well, turn a memory into a design feature.
Personalised framing also gives you control. Instead of squeezing a favourite photo into whatever frame happens to be in the shop, you choose the size and style that suits the photo. A vivid family celebration or a quiet landscape from a weekend away becomes a focal point that catches the eye.
Understanding Frame Sizes: How to Choose the Right Dimensions
A common mistake when buying frames online is misjudging scale. A frame that looks big on a phone screen can look lost on a large living room wall, while an oversized frame can overwhelm a small hallway or bedroom nook.
Sizing Guidelines and Placement
- Mini tabletop frames (3×3 and 4×4 inch): Perfect for desks, bedside tables, shelves and dressing tables, where they’re seen up close. The 3×3 inch photo frame and 4×4 inch photo frame are small enough to sit anywhere without cluttering the space.
- Small wall frames (4×6 to 6×8 inch): Ideal for gallery wall groupings, narrow walls, staircases and bedroom corners. The 4×6, 5×7 and 6×8 inch frames work beautifully on their own on a small wall, or together in a cluster.
- Medium and large frames (A4 and bigger): Best as a single focal point above a sofa, bed or console table, where they’re viewed from across the room. These need a high-resolution original photo so they stay sharp when enlarged.
The 60% rule: When hanging frames above furniture like a sofa or console table, aim for the whole arrangement to cover roughly 60–75% of the furniture’s width. It keeps the display looking intentional and grounded in the room.
Small frames don’t have to look small. A group of six 5×7 frames can fill the same wall space as one large frame, with more stories in it.
Planning a Multi-Photo Gallery Wall
If you’d rather show a collection of moments than one big image, a gallery wall is a great approach. It lets you display a travel timeline, a growing family or wedding highlights side by side.
To keep a multi-frame setup looking organised rather than chaotic:
- Keep spacing consistent: Leave the same 2–3 inch gap between every frame.
- Use a central line: Align the centres of your frames along an imaginary line at eye level, roughly 57–60 inches from the floor.
- Unify the frame colour: If you’re mixing sizes, matching frame colours, such as all black, all white or all brown, tie the display together.
- Plan on the floor first: Lay the frames out on the floor, or tape paper cut-outs to the wall, before you put a single nail in.
Understanding Frame Materials
The look and lifespan of a frame depend on what it’s made of. Indian homes go through big swings in humidity and temperature, so material matters.
Frame Border Materials
- Solid wood: Natural grain and a warm, classic look that suits traditional interiors. It’s heavier and needs protection from moisture.
- MDF: Engineered from compressed wood fibres, MDF gives a smooth, even surface for clean, painted finishes and stays stable indoors.
- Synthetic wood: Lightweight and moisture-resistant, with a wood-like or solid-colour finish. It’s a practical, long-lasting choice for humid and coastal cities. Little Moments’ personalised frames are made from synthetic wood.
Front Protective Material
- Glass: Very clear and scratch-resistant, but heavy on large frames and breakable if dropped.
- Acrylic: Lightweight and shatter-resistant, which makes it a safer choice for children’s rooms, busy hallways and homes with pets.
What Makes a Framed Photo Last
The print inside matters as much as the frame around it. A few simple things make the biggest difference:
- Start with a sharp original. Use the photo straight from your phone’s gallery, not a copy forwarded on WhatsApp or saved from social media. Compressed copies look soft once printed and framed.
- Choose the right size for the photo. A photo that’s sharp at 5×7 may look soft at A4. If a photo is borderline, choose a smaller frame.
- Keep frames out of harsh, direct sunlight. Strong sunlight is the most common cause of fading over the years.
- Avoid damp walls. Bathrooms and walls with seepage can damage both the frame and the print.
Matching Frame Styles to Your Room
The right frame style depends on where it will live.
| Feature | Wall-mounted frames | Tabletop frames |
|---|---|---|
| Best placement | Living room walls, hallways, staircases, above the bed | Study desks, console tables, bedside tables, shelves |
| What to check | A sturdy hook or hanger on the back | A stable stand that doesn’t tip |
| Best sizes | 4×6, 5×7, 6×8 inch and up | 3×3 and 4×4 inch |
| Goal | Creates a focal point and anchors the room | Adds a personal touch up close |
For a formal living room, a set of black frames gives a clean, high-contrast look that suits contemporary Indian interiors. For a warmer feel, brown frames pair well with wooden furniture, and white frames keep small rooms feeling light.
For a home office or bedroom, a small tabletop photo frame keeps a favourite memory close without taking up wall space.
How to Choose and Order Your Frame
- Measure your space. Check the open area on the wall or table, and note the width and height you have to work with.
- Pick your best photos. Choose sharp, well-lit originals straight from your camera roll.
- Choose your size and colour. Match the frame size to the viewing distance and the colour to your room.
- Upload and crop. On Little Moments, upload your photo on the product page and adjust the crop so faces sit comfortably inside the frame. Your photo arrives already printed and fitted, ready to display.
Related reads
- Creative ways to display photo prints at home
- Best photo print dimensions for albums and keepsakes
- The ultimate anniversary gift guide
Frequently Asked Questions About Personalised Photo Frames
What is the ideal spacing between frames on a gallery wall?
Keep a consistent gap of 2–3 inches between frames. Even spacing keeps a multi-photo layout looking organised and intentional rather than cluttered.
Is glass better than acrylic for a photo frame?
Glass is very clear and scratch-resistant but heavier and breakable. Acrylic is lightweight and shatter-resistant, which makes it the safer choice for busy hallways and homes with children or pets.
How do I stop framed photos from fading?
Keep frames out of strong, direct sunlight and away from damp walls. Starting with a sharp, original photo also keeps the print looking good for longer.
Which frame size is best for a desk?
Small tabletop frames, such as 3×3 or 4×4 inch, suit desks and bedside tables because they’re seen up close and don’t take up much space.
What photo resolution do I need for a framed print?
Use the original photo from your phone or camera, not a compressed copy from a messaging app. For a 6×8 inch frame, a photo of about 1800 × 2400 pixels gives a crisp result, which any modern phone camera easily exceeds.
Conclusion
Personalised frames turn empty walls and bare desks into a warm reflection of your life story. Choose sizes that suit the space, pick a material that suits your climate and arrange your frames with a little planning, and you’ll have a home that shows off the memories that matter most.
Take some time to go through your camera roll, pick out the photos that bring you the most joy and start building your display today.
Pingback: How to Display Photo Prints at Home – 10 Creative Ways
Pingback: How to Reprint Old Photos: Scan With Your Phone & Print